
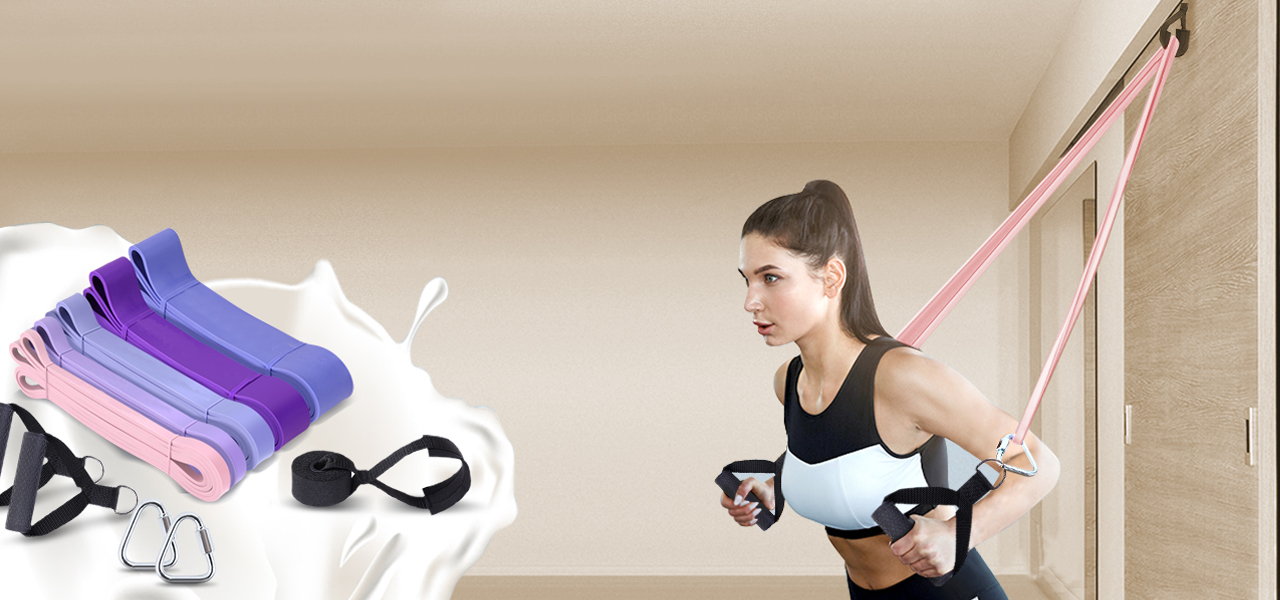
You bought a set of resistance bands. Maybe they came in a neat little pouch, five colors, a door anchor you have no idea what to do with. You did three bicep curls, wondered if anything was actually happening, and tossed them in a drawer.
You’re not alone. It’s the most common story in home fitness.
Here’s the good news: those bands work. Not “work for a rubber band” but work, full stop, and the research backing that up is stronger than most people realize. The global resistance band market was worth about $1.66 billion in 2024 and is projected to nearly double by 2030 (Grand View Research), largely because 56% of exercisers now train at home at least some of the time. The tool isn’t the problem. The missing piece is knowing how to use it.
This guide fixes that. We’ll cover which bands to start with, how to set up safely, eight exercises that cover your whole body, and a simple four-week plan. No gym membership required, no guesswork.
Picking Your First Set of Bands
Walk into any sports store (or scroll Amazon for ninety seconds) and you’ll face four main types. Each has a job.
| Band Type | Best For | Watch Out For |
| Mini loop bands | Glutes, hips, warm-ups | Rolling up on bare skin |
| Long loop bands (41 inch) | Squats, rows, assisted pull-ups | Too much resistance for small muscles |
| Tube bands with handles | Presses, curls, anything you’d do with dumbbells | Cheap clips and carabiners |
| Flat therapy bands | Rehab, shoulder mobility, seniors | No handles, grip fatigue |
For most beginners, a tube band set with handles and a door anchor is the most versatile starting point. It mimics dumbbell and cable machine movements, which makes the learning curve gentle. Add a set of mini loop bands if glute and hip work is a priority, and honestly, it should be. Desk life switches those muscles off.
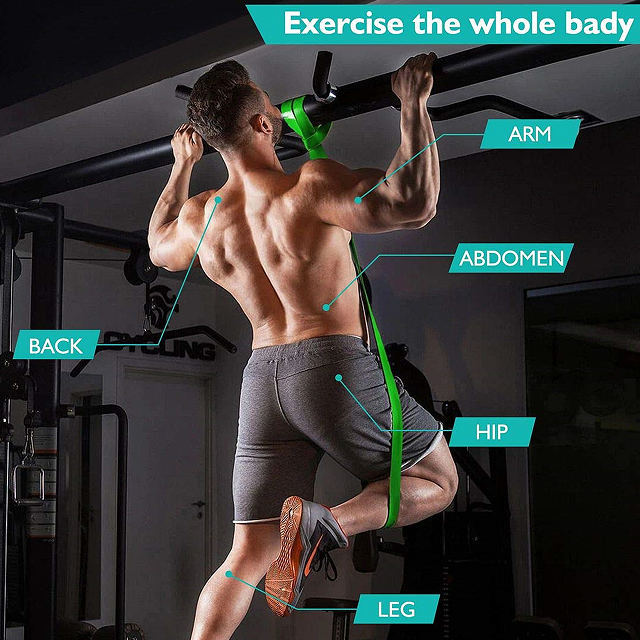
A few buying notes worth your attention:
- Start light, not heroic. Most sets are color-coded. The classic TheraBand scale runs from yellow (roughly 1 to 6 lbs of resistance) up to black (4 to 18 lbs) and beyond. Yellow or red for upper body isolation work, green or blue for rows and squats is a sensible opening combination.
- Material matters for lifespan. Natural latex bands offer the smoothest stretch and best snap-back, but they degrade faster in sunlight and heat. TPE (thermoplastic elastomer) bands are latex-free, slightly stiffer, and a good pick if you have a latex sensitivity. Fabric-covered bands resist snapping entirely, though they cost more. We break this down in detail in our guide to latex vs TPE resistance bands.
- Check the hardware. If the set includes handles, clips, or a door anchor, the stitching and metal parts fail long before the band does. That’s where quality differences hide.
- Budget is friendly. A decent starter set runs about $25, according to Cleveland Clinic, which is less than a single month at most gyms.
Safety Before Your First Rep
Resistance bands are among the lowest-risk training tools you can use. A safety analysis of more than 38,000 participants referenced in the ACSM’s position stand found that progressive resistance training doesn’t significantly increase serious adverse events, even in people with cardiovascular conditions.
Low risk isn’t zero risk, though. An American Council on Exercise survey suggested roughly 20% of band users have experienced an injury from improper use, and almost all of those incidents trace back to a short list of preventable mistakes:
- Inspect the band every session. Run your fingers along the full length. Nicks, thin spots, small tears, or white discoloration mean the band is done. Retire it. A snapping band under full tension is basically a whip.
- Test your anchor. If you use a door anchor, the door must close toward you, so the band pulls the anchor into the frame rather than out of it. Tug hard before you load it.
- Wear shoes. Standing on a band in socks is how ankles roll.
- Never let go of a stretched band. Control the return on every rep, all the way back.
- Don’t over-stretch to fake extra resistance. Most bands are rated to about two to three times their resting length. Past that, you’re in snap territory.
If you have a diagnosed heart condition, a recent joint replacement, or you’re pregnant or recently postpartum, check with your doctor or a physiotherapist first. Nearly all of them will encourage you to train. They just want you to start at the right resistance.
Related Reading: Which Yoga Mat Is Better, Tpe Or Nbr
Eight Beginner Exercises That Cover Your Whole Body
These eight moves hit every major muscle group the ACSM says you should train. Do them in order, and you’ve got a complete session in about 20 minutes.
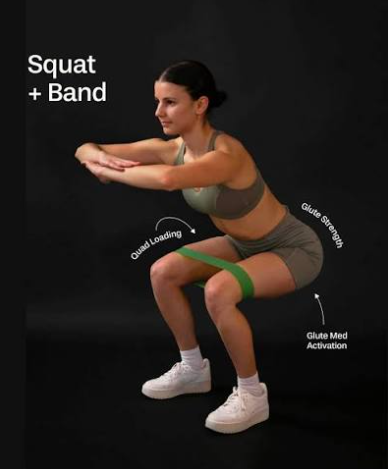
1. Banded Squat. Stand on the middle of a long band, feet hip-width apart, holding the ends at shoulder height. Sit your hips back like you’re lowering into a chair, chest up, then drive through your heels to stand. This is your legs and glutes foundation.
2. Standing Row. Anchor the band at chest height (or loop it around your feet while seated, legs extended). Pull both handles toward your ribs, squeezing your shoulder blades together at the end. Rows counteract the rounded-shoulder posture that desk work builds, and most beginners need this more than any other move.
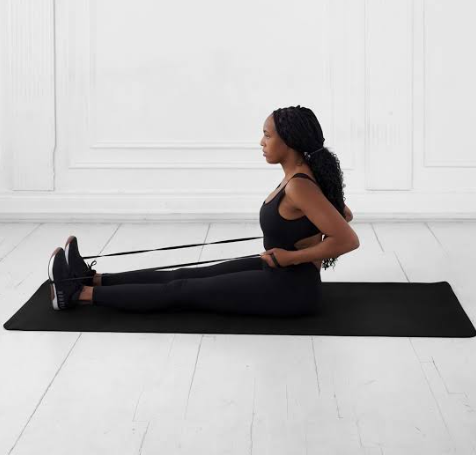
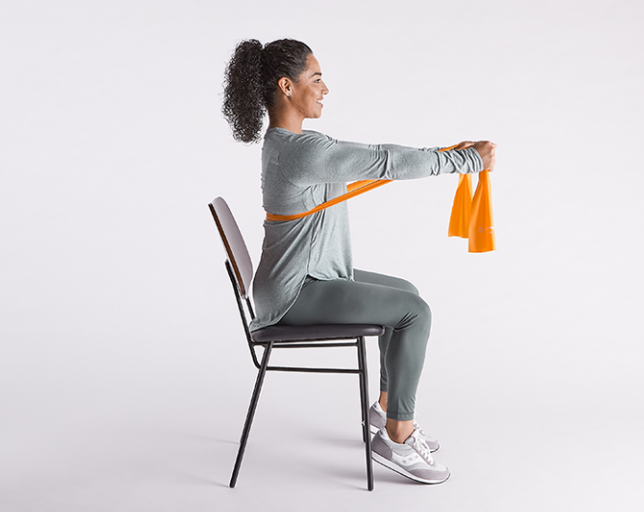
3. Chest Press. Wrap the band behind your upper back, ends in each hand. Press forward until your arms straighten, pause for a beat, return slowly. This is your bench press, minus the bench.
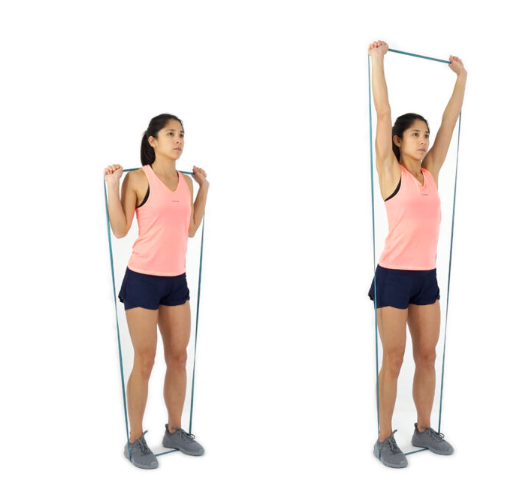
4. Overhead Press. Stand on the band, handles at shoulder height, and press straight up without arching your lower back. If your back wants to lean, the band is too heavy. Drop a level.
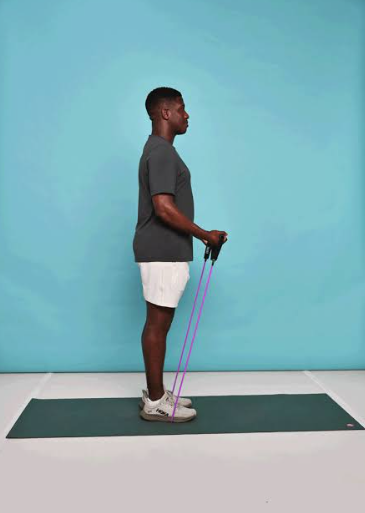
5. Bicep Curl. Stand on the band, palms forward, curl with your elbows pinned to your sides. Simple, effective, and a great way to learn what constant tension feels like.
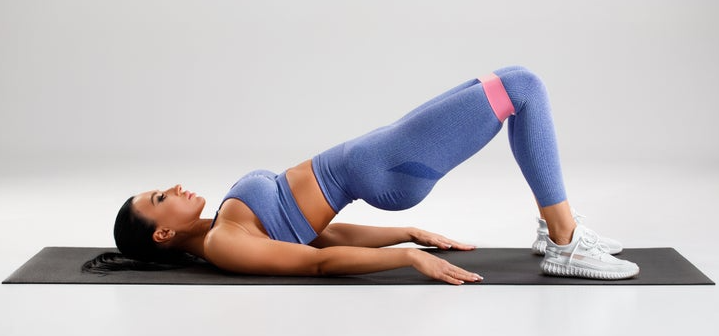
6. Glute Bridge with Mini Band. Lie on your back, mini band looped just above your knees. Drive your hips up while pressing your knees outward against the band. Squeeze hard at the top for two seconds. That outward press is what wakes up the glute medius, the hip stabilizer that protects your knees.
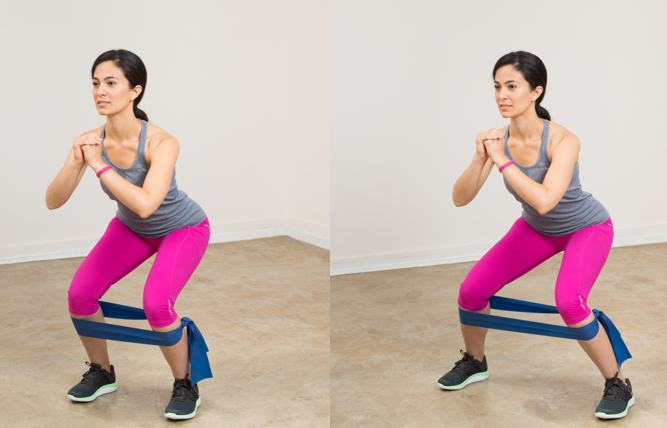
7. Lateral Band Walk. Mini band above the knees, quarter-squat stance. Step sideways for 10 steps, keeping tension on the band the whole time, then come back. It’ll burn in a place you didn’t know could burn. That’s your hip stability improving.
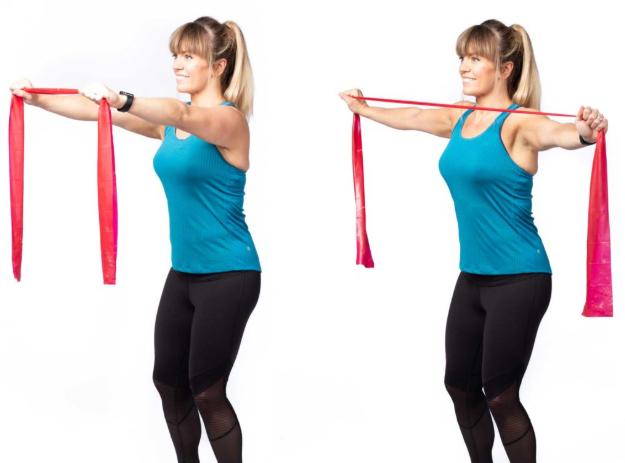
8. Band Pull-Apart. Hold a light band at shoulder height with straight arms, then pull it apart until it touches your chest. This one looks too easy to matter. It isn’t. It strengthens the rear shoulders and upper back muscles that keep your posture upright.
Your First Four Weeks
The ACSM recommends training all major muscle groups at least twice a week, and notes something encouraging: the single biggest gain in health comes from going from no resistance training to any resistance training. Two sessions a week still counts. Three is better if your schedule allows.
| Week | Sessions | Sets x Reps per Exercise | Focus |
| 1 | 2 | 2 x 10 | Learn the movements, light band |
| 2 | 2 to 3 | 2 x 12 | Slow the lowering phase to 3 seconds |
| 3 | 3 | 3 x 12 | Add the third set |
| 4 | 3 | 3 x 12 to 15 | Move up one band level on your strongest lifts |
Rest at least one day between sessions. Sleep and protein do the actual building; the workout is just the request.
How to Keep Progressing After Week Four
Bands don’t come with weight plates, so progression works differently. You have four levers, and you should use them in roughly this order:
- Add reps. 10 becomes 12, 12 becomes 15. Easy wins first.
- Slow down. A three to four second lowering phase dramatically increases time under tension, which is a primary driver of muscle growth.
- Shorten the band. Step wider, choke up on your grip, or move further from the anchor. More stretch means more resistance from the same band.
- Move up a level. When an exercise feels easy two sessions in a row, grab the next color. Or stack two bands together.
The last few reps of every set should feel hard. If you could keep going forever, the band is telling you to level up.
Mistakes That Slow Beginners Down
Most stalled progress comes from three habits. Using a band that’s too heavy is number one: it forces you to arch, swing, and cut the range of motion short, which means less muscle work, not more. Going too light on leg exercises is number two, because your legs are far stronger than your arms and can handle (and need) real resistance. Number three is inconsistency disguised as variety. Hopping between random YouTube workouts feels productive, but repeating the same core movements for four to eight weeks is how you actually measure progress.
One more that nobody warns you about: bands rolling up your thighs during lateral walks. Wear leggings or shorts with some grip, or place the band just above the knee instead of mid-thigh. Small fix, much better session.
A Note for Studios and Retail Buyers
If you’re reading this as a yoga studio owner, gym buyer, or fitness brand rather than an individual beginner, the beginner angle matters to you too, because your newest members are exactly these people.
For commercial use, durability questions come first. Studio bands get stretched hundreds of times a week, wiped down constantly, and occasionally abused. Natural latex performs beautifully but has a replacement cycle; fabric-covered bands last longer under heavy traffic. Smart studio owners factor replacement cost per year into the purchase, not just unit price.
When sourcing from a resistance band supplier or manufacturer, ask about material certifications, batch testing, and resistance tolerances. Two bands labeled “medium” from different factories can feel surprisingly different. If you’re placing a bulk order for a studio chain or building a fitness product line, most manufacturers offer OEM and private label options, so a custom logo on bands your members take home doubles as quiet marketing. Wholesale pricing on sets makes them one of the highest-margin retail items a yoga studio can stock next to the mat rack.
Frequently Asked Questions
How often should a beginner use resistance bands? Two to three full-body sessions per week, with at least one rest day between them. That’s the ACSM baseline, and it’s enough to see measurable strength gains within eight weeks.
What resistance level should a beginner start with? Light to medium. On the common color scale, that’s yellow or red for arm and shoulder work, green or blue for squats and rows. You should finish each set feeling like you had two or three good reps left in you.
Can you build muscle with just resistance bands? Yes. Multiple studies and a 2019 meta-analysis found no significant difference in strength gains between bands and conventional weights when effort is matched. The condition is effort: the final reps need to feel hard.
How long should a beginner band workout take? Twenty to thirty minutes is plenty. A warm-up, eight exercises, and a short stretch fits comfortably in that window.
Are resistance bands safe for seniors? They’re one of the safest options available. Physical therapists prescribe them precisely because the resistance is low-impact and controllable. The 2025 meta-analysis on older adults showed large improvements in strength and balance from simple home programs.
Do resistance bands help with weight loss? They contribute. A 2022 review of 18 trials found band training reduced body fat in overweight participants more effectively than free weights or bodyweight exercise alone. Pair training with sensible eating for real results.
Getting Started Is the Whole Game
Every expert was once the person standing on a band, wondering if they were doing it right. The gap between you and results isn’t knowledge or equipment. It’s eight weeks of showing up twice a week.
So pull the bands out of the drawer. Start with the squat and the row tomorrow morning, ten reps each, before your coffee gets cold. That’s day one. The rest of this guide will be waiting when you come back.